

Saturn (referred to as "rTalk") for Advantest SmarTest 8 is a Java application that controls Cassini TIMs from any supported operating system. This document focuses on the basic operations of the Saturn software with a RI8611A Cassini V93K CTH Infrastructure. rTalk is the software platform and system prerequisites needed to run Saturn software to control the Cassini system. The "rTalk on tcp://127.0.0.1:1883" window (see Figure 1) is also referred to as the "Saturn launch window" or "main application" below. The Fixture and all of the TIMs are "hot swap" capable can be added or removed while the system is Powered On.
To Start rTalk:
- Follow the steps to Install rTalk for Adventest SmarTest 8 before proceeding.
- rTalk is started automatically when the OS startup is performed graphical desktop session started.
- Wait for the software to compile and a System Startup performed before proceeding. The final message is "Tester Loaded" (see Figure 1).
To Close rTalk:
- Select the red Close icon in the upper right corner.
- Choose Yes when prompted to Exit main application? (See Figure 2)
To System Check:
- A system check should be performed after each hardware change. "Remove Fixture, check, Add Fixture, check." and similarly, "Remove TIM, check, Add TIM, check"
- From the Saturn launch window, choose apps > cassini and double click on tester browse to open the Configuration window (see Figure 3).
- Choose check and monitor the rtalk message window.
- Any changes should be reflected in the active configuration. Fixture and DeviceInterface should now appear in the Test Browser window if the electronic serial number (ESN) has valid cal data. Refer to steps below To Register a New Fixture/DIB if using a new ESN.
To Startup:
- A startup should be performed only if needed and the Fixture should not be attached during startup to avoid damaging the Device Interface board. A startup is performed automatically when rTalk is started.
- Unlatch the Fixture or Diag/Cal plate.
- From the Saturn launch window, choose apps > cassini and double click on tester browse to open the Configuration window (see Figure 3).
- Choose startup and monitor the rtalk message window.
- All instruments will be powered off and loaded in the active configuration.
Note: These steps require a Diag/Cal Plate for use with a specific configuration of installed TIMs.
- Launch Saturn and wait for "Tester Loaded." shown in the message window. If not already running, start a 20 minute timer to allow instruments to warm up.
- Unlatch the Fixture if it is attached and Latch the Diag/Cal Interface plate (from the Diagnostic Kit case).
- From Saturn app, choose apps > browse tester and confirm the Fixture is similar to "<Company> bottomplate ##". If it is not active, choose check to initiate a system check.
- From Saturn app, choose apps > cassini, select cal exec and choose Launch App from the right mouse button menu.
- Choose File > Diag List and select the appropriate Diag list (likely "<Company>... Rev A" or "<Company> Fixture...").
Note: Wait up to 20 minutes from a cold start for TIMs to warm up. - Select ALL service plans (CTL+A or CTL+left mouse button click) and choose choose Run Selected from the right mouse button menu.
- If any FAIL results are found, follow the steps below to To View and Save Diagnostic Results. Send results to support@roos.com. If all results PASS, proceed to release system to production or continue with calibration.
- Close the Diagnostic List window.
Note: These steps require a valid SmartTest8 installation or access to a Diag/Cal system testplan
- Compile and Run a program with Cassini Macros with SmarTest8.
- Choose apps > cassini > testplan to see graphical view.
- (optional) To change testplans, choose testplan > load. (Avoid compiling and running in both user interfaces, stay in SmarTest8 unless specifically instructed by RI support).
To Control At SmarTest 8 Breakpoint:
- Compile and Run a program with Cassini Macros with SmarTest8 at a breakpoint.
- Choose apps > cassini > tester control to view the Configuration window.
- Select the instrument name in the left pane, control panel in the middle pane, then click on any setting and set the new value.
To Calibrate Fixture (RiFixtureDef):
Note: These steps require a Fixture with Cal List to be active on the tester.
- From the Saturn launch window, choose apps > cassini and double click on cal exec to open the Cal Exec user interface.
- Choose Actions > Open List and choose the Cal List.
- (Optional) Choose File > Load Cal Kit and choose the appropriate entry. RiCalKit naming convention sets the date as the last valid cal date and should be checked if in the past. The Cal Kit contains the Open Coefficients and Noise Source ENR table and should be valid.
- Choose File > Calibration List and select the appropriate entry (likely "Acme Rev A")
- Follow the user prompts. These often require connecting PKZ#12 adapters to either a Power Sensor, SMA cable, and OSL standards. (See Figure 1 and Figure 2)
IMPORTANT: ALWAYS follow good RF connector hygiene and use a SMA Torque wrench when tightening and avoid rotating the inner cable, ALWAYS rotate the outer nut. - Repeat until the list is completed. Cal data is ONLY saved after every successful validate. If a validate fails, repeat all selected Cal plans.
Note: TIMs are "return to factory" for calibration, system calibration is handled by Roos Instruments in Santa Clara, California.
- From the Cal List window, choose Actions > Results. (See Figure 4)
- From the Worksheet, choose Data > Save Csv to convert the data in the worksheet to a .csv file in the ~\RiApps\data directory.
NOTE: If the .csv file does not appear, install "python-is-python3" package to map "python" command to "python3". (root access may be required)
To Register a New Fixture:
- When a new Fixture is attached to Cassini, follow these steps to associate it with a Fixture Definition by saving Cal Data.
- From the Saturn launch window, choose apps > cassini > tester browse
- Choose Tester > Add Fixture Def and select the intended RiFixtureDef from the list.
- Choose Save Cal from the right mouse button menu with the Fixture instrument selected.
- When a new Device Interface Board (DIB) is attached to Cassini, follow these steps to associate it with a Fixture Definition by saving Cal Data.
- From the Saturn launch window, choose apps > cassini > tester browse
- Choose Tester > Add DIB Def and select the intended RiDibDef from the list.
- Choose Save Cal from the right mouse button menu with the Dut Interface instrument selected.
- When a replacement TIM is attached to Cassini, follow these steps to associate the instrument name and serial number by saving the Tester Def.
- From the Saturn launch window, choose apps > cassini > tester browse
- Choose Tester > save to associate the instrument serial numbers with the currently assigned names.
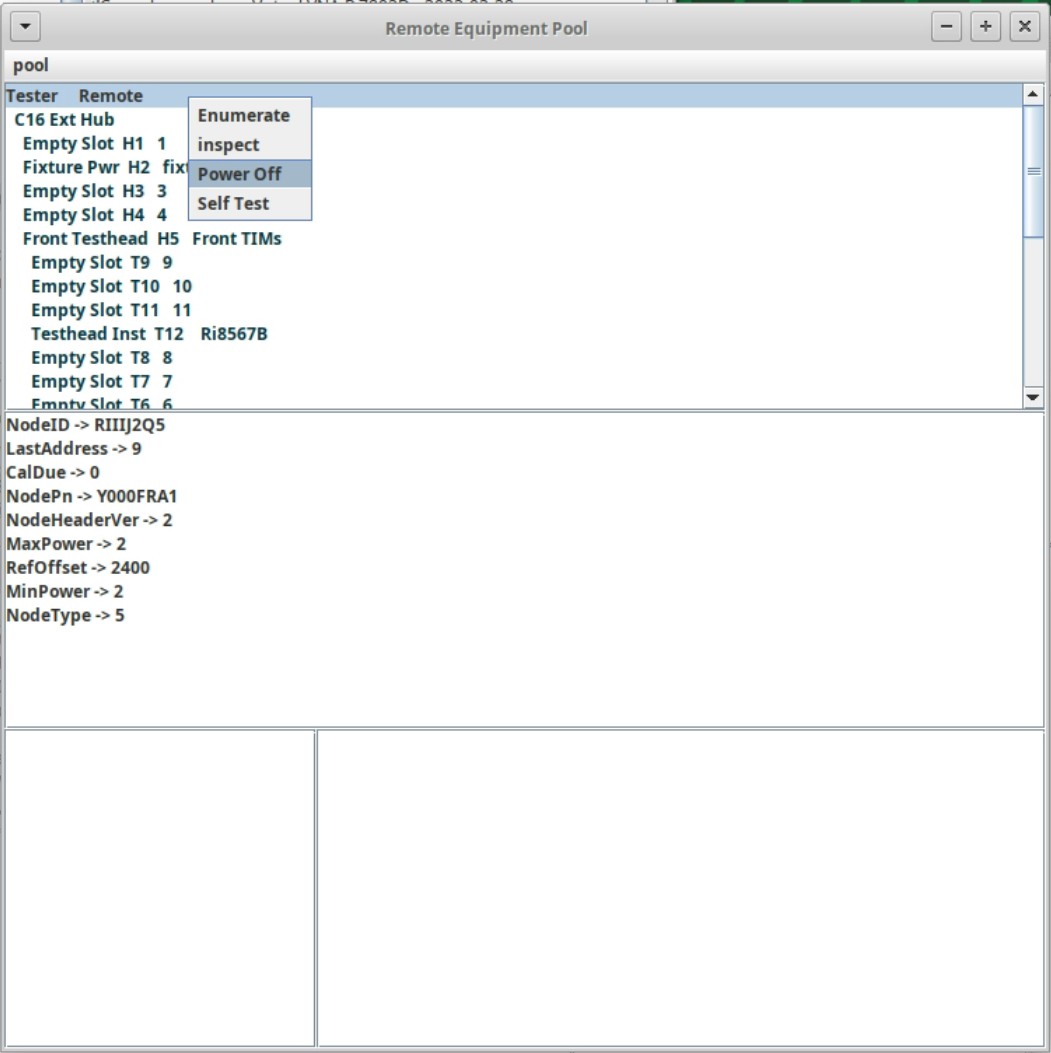
- From the Saturn launch window, choose apps > cassini > equipment
- Choose Tester remote to select that node in the equipment pool. (See Figure 8) To power off a RIFL hub or specific TIM, select that name instead. When selecting a hub, everything below that in the hierarchy will be powered Off.
- Choose Power Off from the right mouse button menu. The tester is now powered off and can safely be removed from the V93000 or follow the To Startup steps above to power On the system.
Figure 1: Saturn Tester Loaded (Ready)
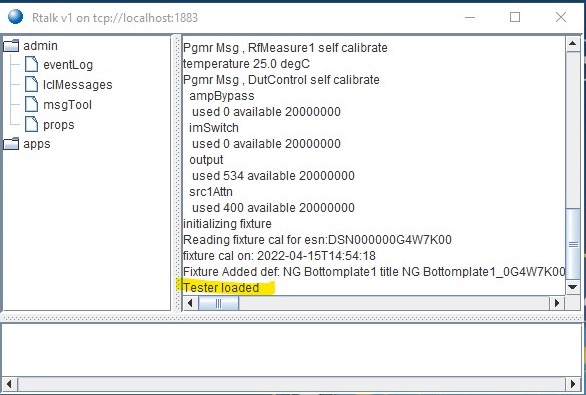
Figure 2: Close rTalk Application
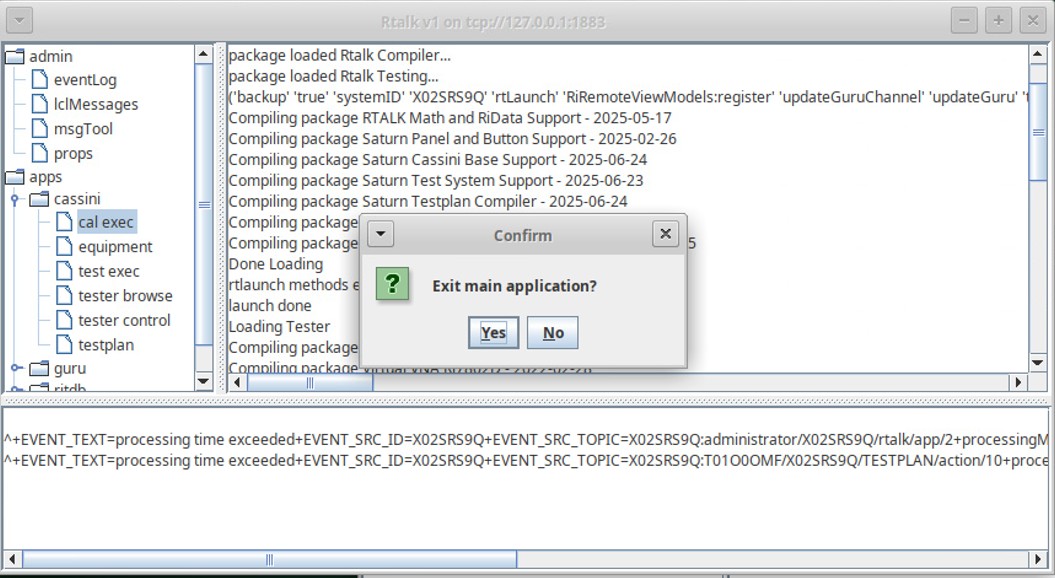
Figure 3: Tester Browse
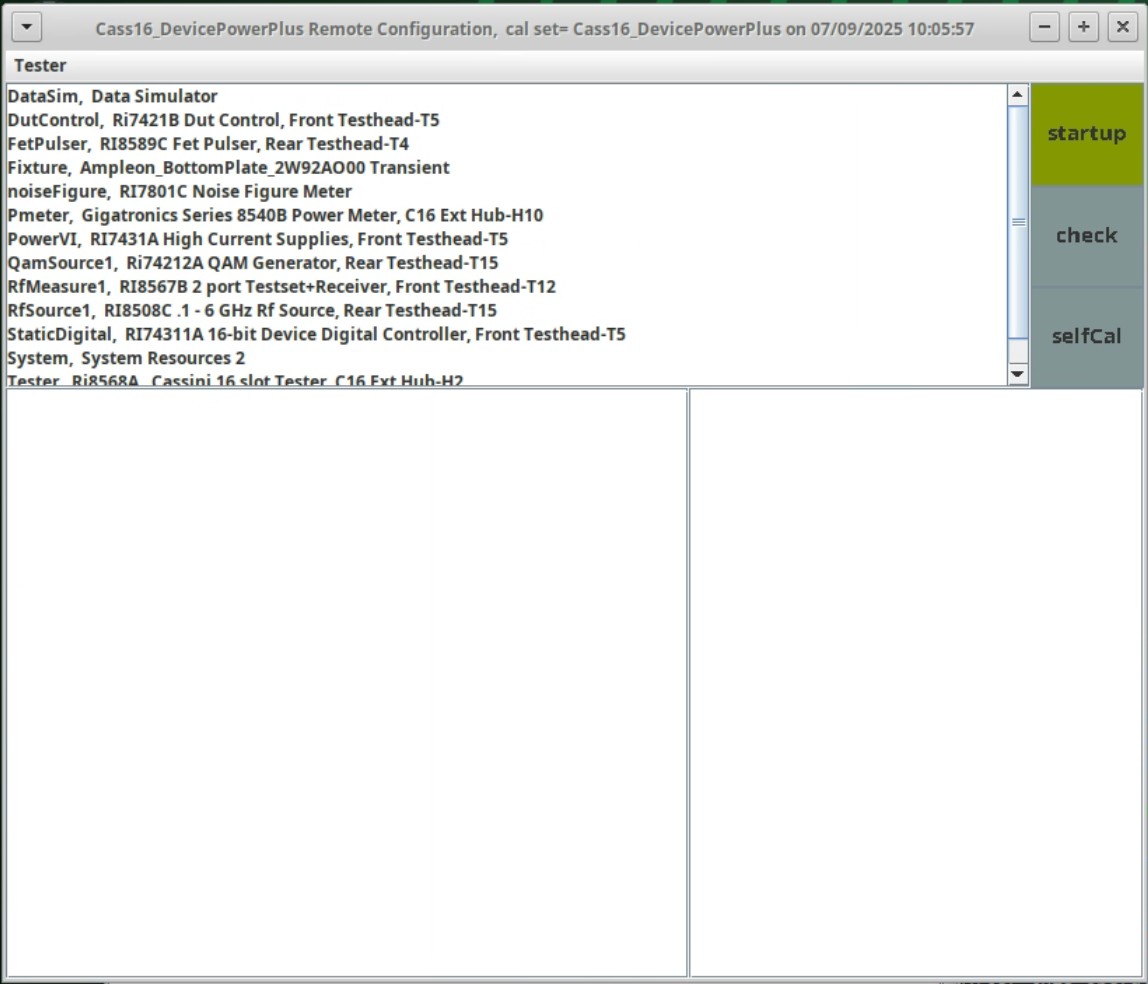
Figure 4: Saturn: apps > cassini > testplan > load
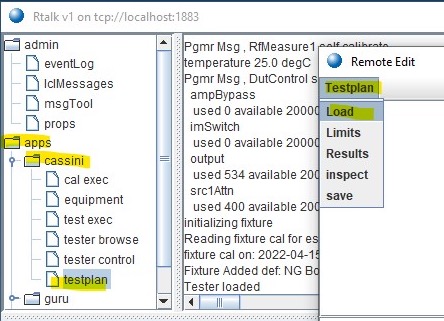
Figure 5: Testplan > Results (Worksheet)
Figure 6: Worksheet Window
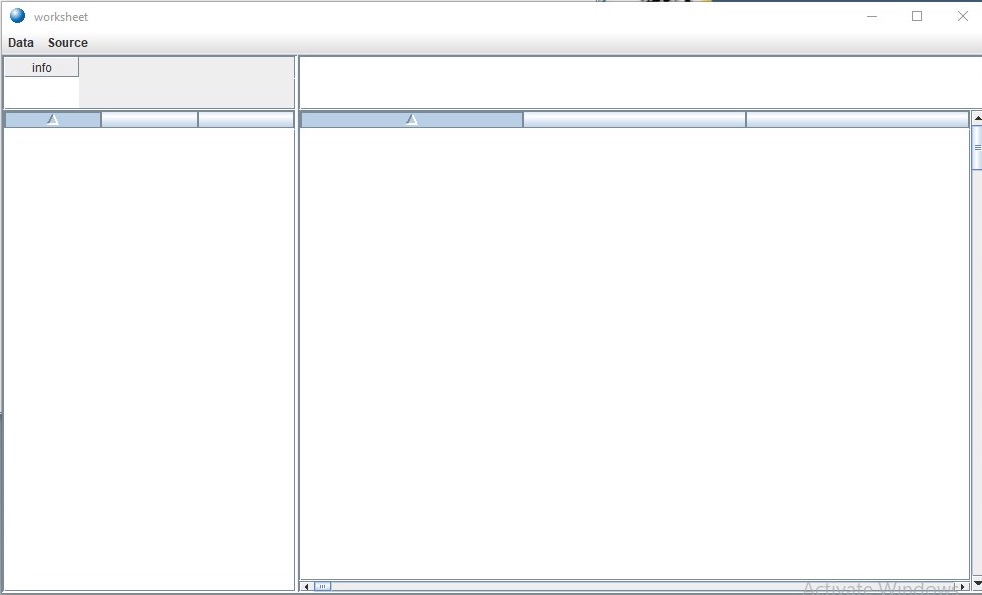
Figure 7: Worksheet with new values
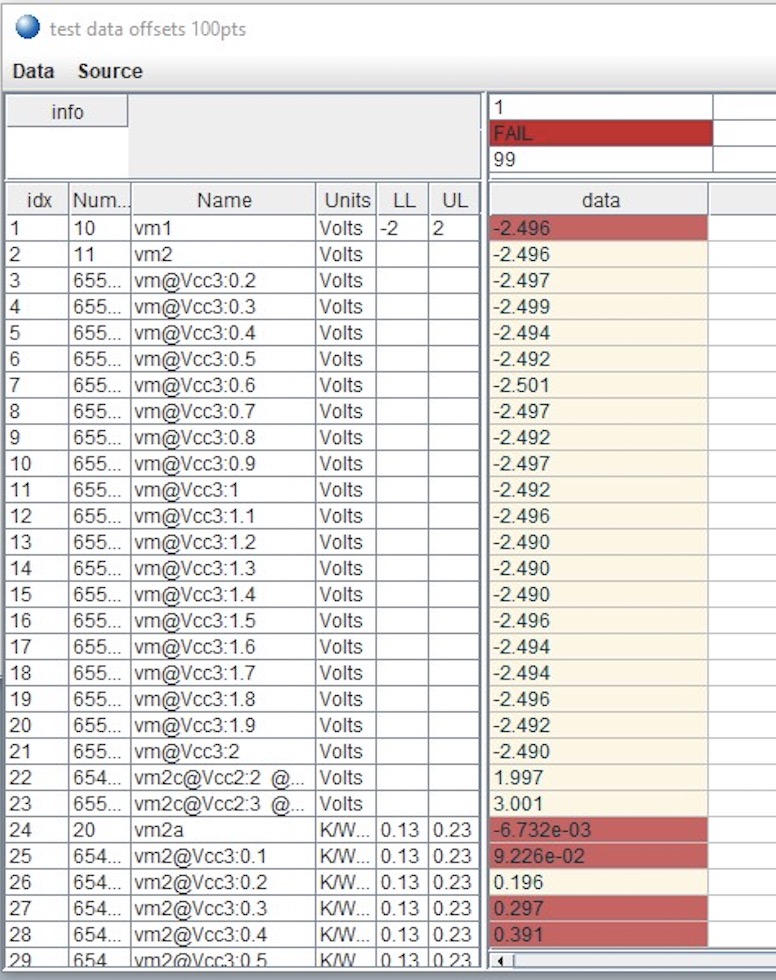
Figure 8: Remote Equipment Pool > Power Off
See Also: Cassini V93K rTalk for Advantest SmarTest 8 Install or Upgrade RPM on RHEL7 https://roos.com/docs/RBEH-D53GUG?Open